This is a record of the effort to built a fairing of variable height for a BMW F 650/800 GS bike model, with materials that can be easily bought out in any market. The main target is to built a variable height adventure fairing, with out special tools or exotic materials and the end product to be cheaper -at least to materials- to the ones the "adventure" motorcycle after market has to offer. But foremost it has to work aerodynamically better than most of the available screens out there, that I tested out and found pretty disappointing. Or just hilariously expensive to buy. A very good starting point though...
Phase One: The Mold
I took the screen that seemed to work better with the wind and has the simplest form and make a polyester mold of it. I chose polyester only because it was the cheapest material I could find. My mold took 4 layers of polyester soaked fiberglass, of the cheapest industrial type, you can find in any hardware store. I applied them to my old screen after I coated it with 4 layers of PVA fluid, so that it wouldn't stick on it permanently. And this what I got! Not bad for a first timer...
Attention: Polyester contains styrene that is harmful, linked to cancer, toxic poisoning, irritating to skin, eyes and lungs, and especially nasty to your brain. So use a proper mask, goggles, gloves, cover your skin, making sure you do it in a well ventilated area, while using it.

I marked the shape of the original screen on it and started taking measurements of other screens (height, width, mounting holes etc) and then I cut it. On the left side image you can see marks for the various heights of other screens, on 27 cm (BMW F650GS), 30cm, 33cm (BMW F800GS), MRA screen, Givi etc I decided not to limit his height so that I could try building base fairing parts in different heights in the future.

Phase Two: The base of the screen

I apply 6 layers of PVA on my mold and wait for it to dry. Then I start covering it with epoxy resin, then covering the resin -as soon as it gets sticky- with aeroglass fabric. Its a cloth similar to fiberglass but its more structurally woven and it can vary to weight and thickness, giving your build either extra strength per layer or easy conformity to shapes, and smooth finishing. Usually you find best to use heavy and thick aeroglass for the first layers and thinner ones for the outer ones. You repeat the resin-layer tango and then you wait for it to cure for some days.

Although epoxy is not as harmful as polyester (and not so stinky!), it is important to take precautions. It is also a big deal that you work in an environment with around 60-70% humidity and with a temperature from 20 to 30 degrees Celsium, if you want to avoid any surprises.
Six or more layers later the mold looks like this. The white cloth around it is the aeroglass. I always cut it bigger cause the sticky epoxy resin won't give you many chances to put it on wrong, as I found out with cursing out loud frustration!
As online resin mentor Ebrabaek (thanks again) described it you should think flypaper spread when you apply the cloth. But he never mentioned me being the fly, stuck with an epoxy filled trap on me!
Phase Three: Unleashing the beast
The black marker transfers the dimensions I chose to the epoxy piece, just before I carefully but sometimes with brute force- detach from the mold, trying dot to destroy any of them. Small wooden or rubber inserts are very helpful at this stage. My dremel tool cuts away the outer material. So from this:
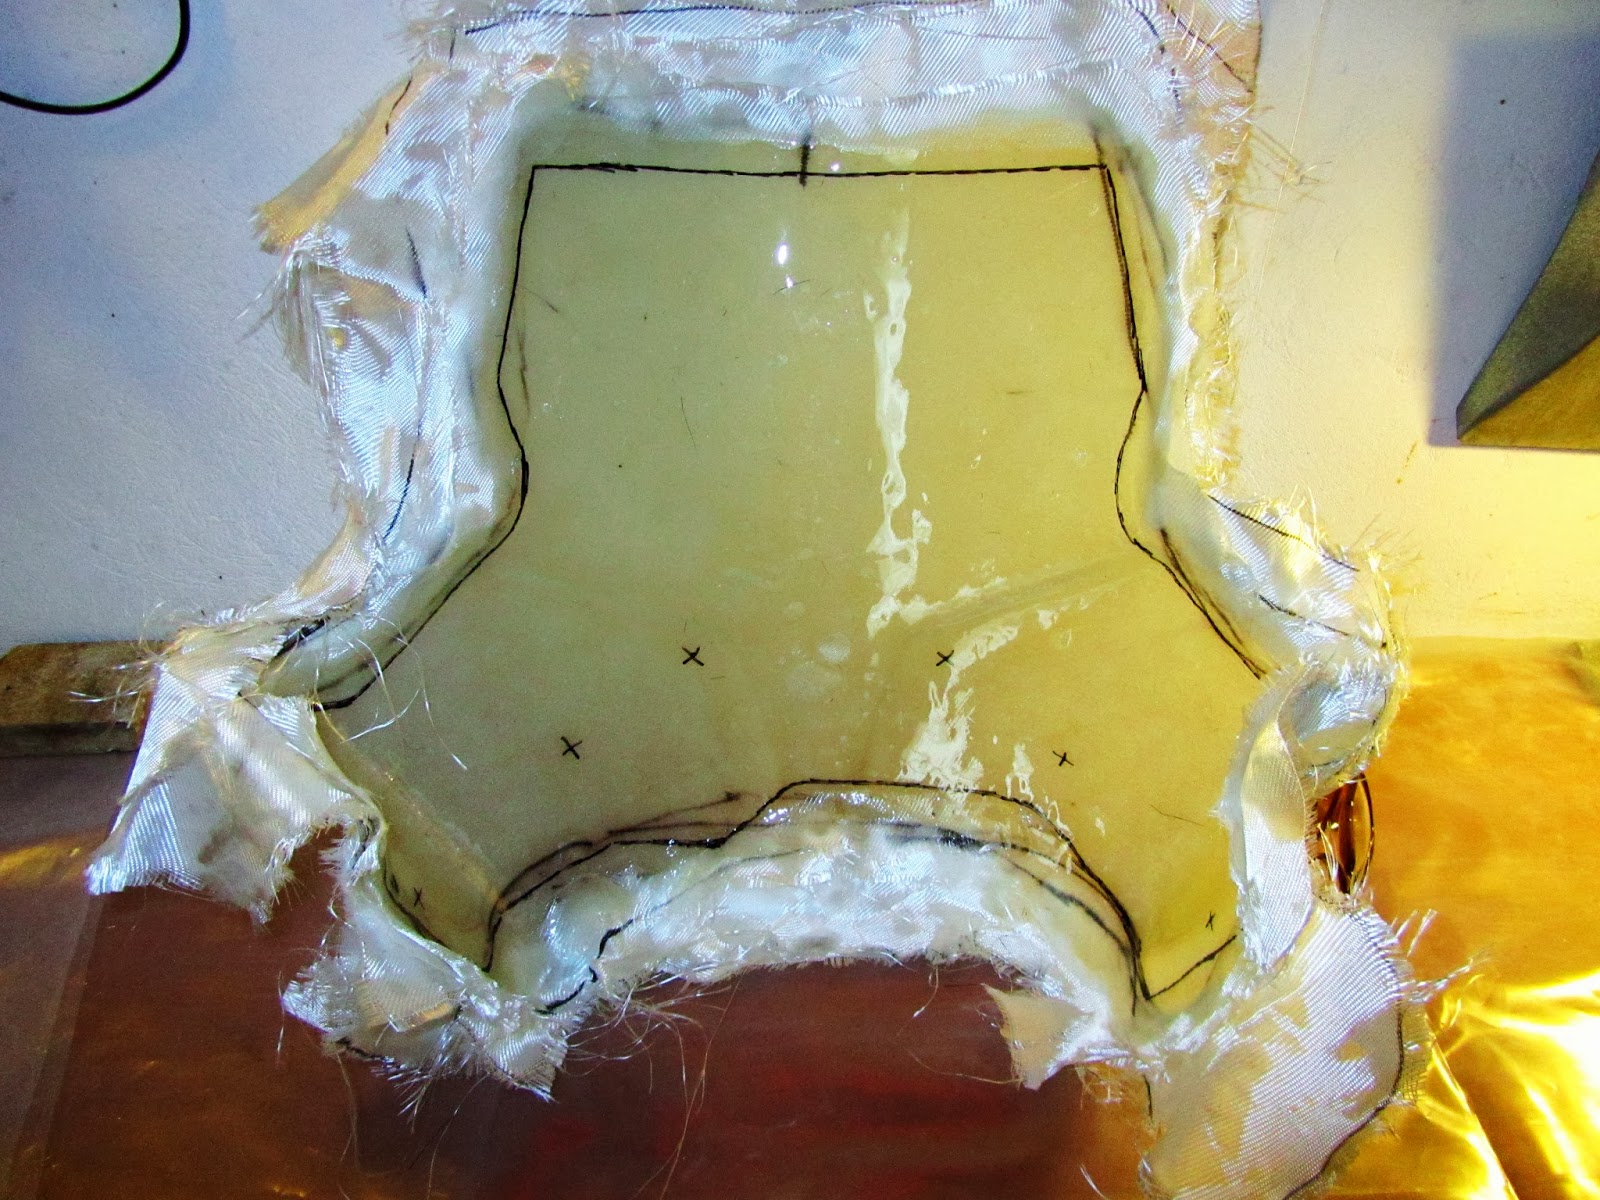
We get to this, after much fiddling, with varius washing and scrubbing devices. Must admit this feels like watching a sculptor releasing a form out of raw marble block...


So far the result is pretty encouraging. The piece I got on hand has a good solid texture, seems extremely strong for a plastic flimsy thing and it weights like a feather, compared to the after market screens. But I will weight it at the end of the process.

Phase Four: Fitting On the Bike


Nice! Now a last thin layer of epoxy resin to make it extra smooth. And then we pop a beer can open, sit back and wait for the resin to settle...
No comments:
Post a Comment